This tutorial descibes how to create a doorway arch in Radiant.
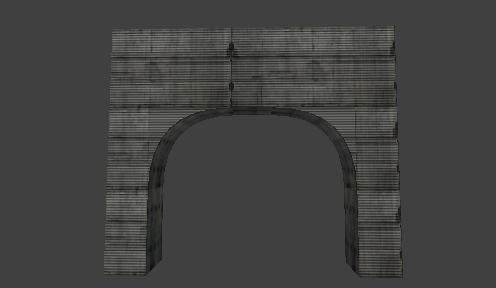


This tutorial descibes how to create a doorway arch in Radiant.
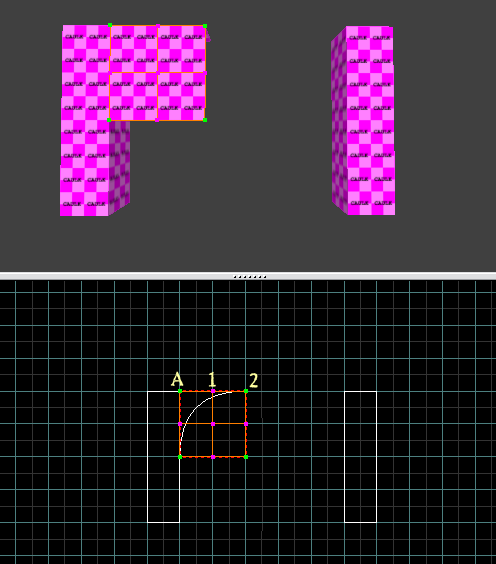
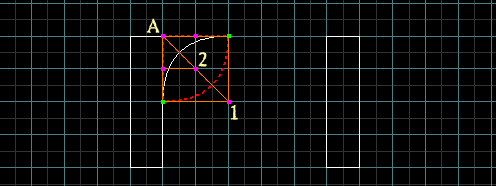
Create two tall brushes to indicate the size of your arch. Use Curve -> Simple Patch Mesh or shift+P to create a new 3x3 patch mesh. Select the patch mesh and press V to edit the vertices. This mesh will become the inside of your arch, make sure it is in the correct position and aligned with your brushes.
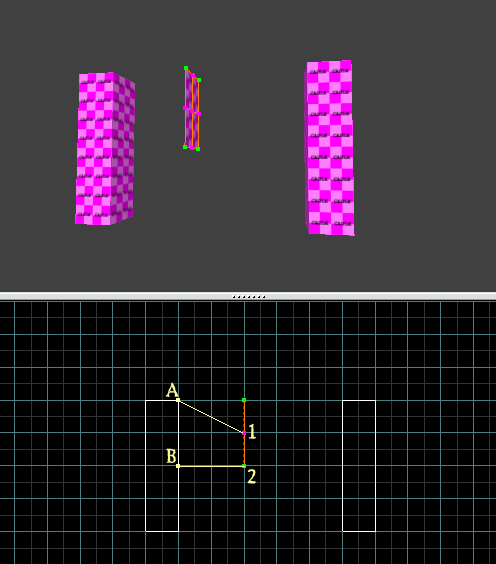
Move the points in position 1 to location A, move the points in position 2 to location B. You can shift+drag to select all the points in the same location at once. The result should look like this:
Create a new brush that has the same size as your patch mesh:
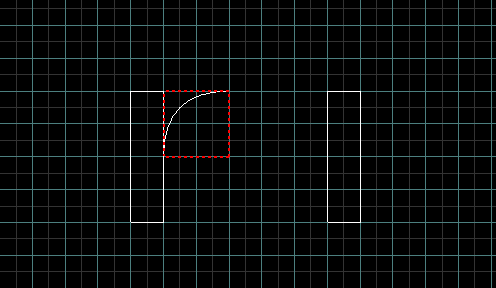
While keeping the brush selected, use Curve -> Simple Patch Mesh or shift+P to create a second 3x3 patch mesh. This will be used to cover the gap between the wall and the inside of the arch.
Align the new patch mesh with the front wall.
Move the points in positions 1 and 2 to location A.
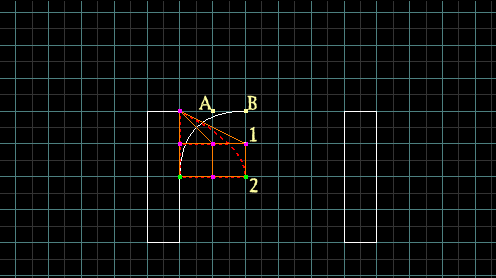
Move the point in position 1 to location A, move the point in position 2 to location B.
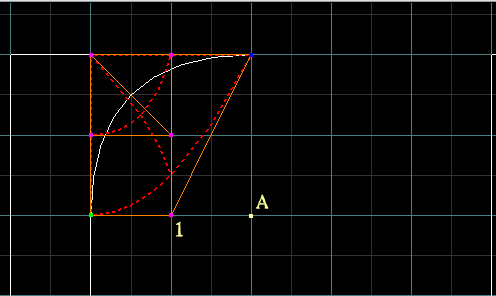
Move the point in position 1 to location A.
This is not yet the mesh we need, but you can use this fan-like mesh if you want to create an inverted arch.
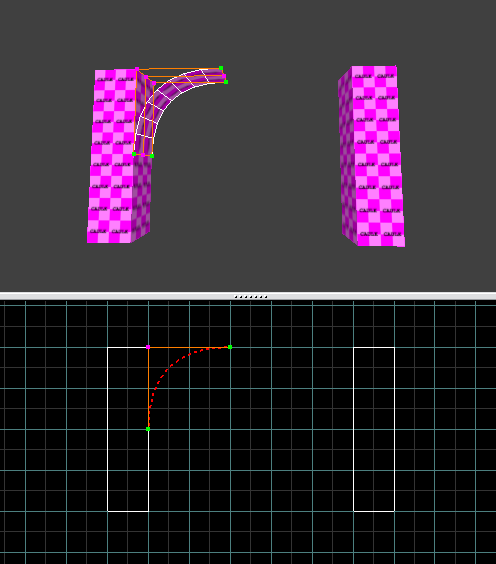
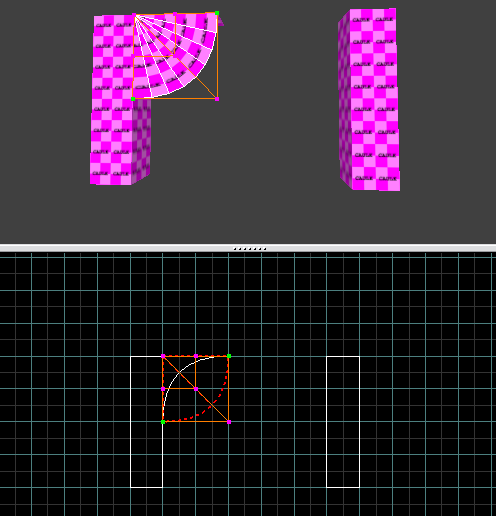
Finally, move the points in position 1 and 2 to location A.

Copy the patch meshes to the other side of the arch and mirror them. Add a brush to cover the top of the arch.
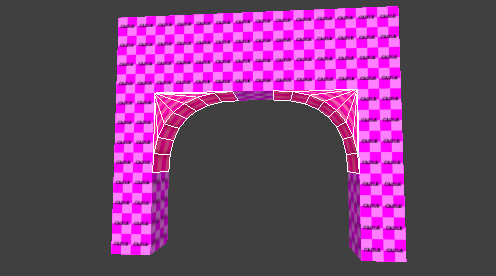
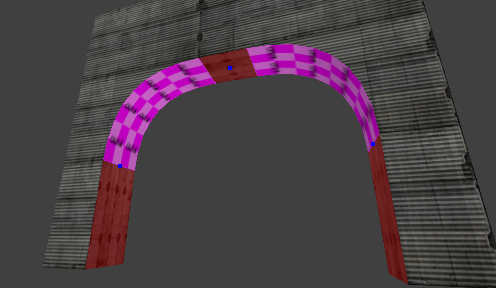
Your arch has been constructed, now it has to be textured. We will use two different textures: one for the wall, and one for the inside of the arch.
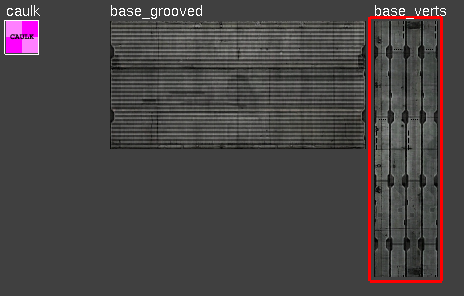
For this tutorial I have chosen two textures used in the map Karith: karith/base_grooved for the wall and karith/base_verts for the inside.
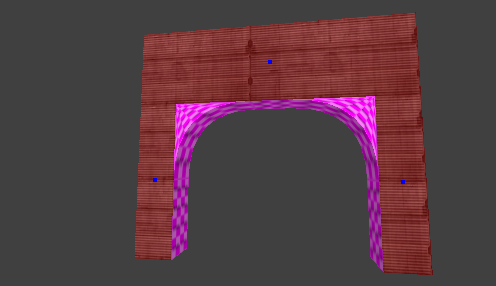
Select the wall faces of the brushes with shift+ctrl+click and texture them with the wall texture.
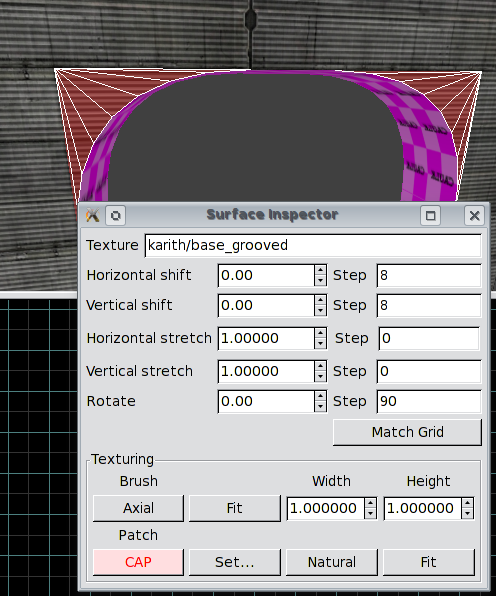
Select the front patch meshes and texture them with the wall texture. Open View -> Surface Inspector or press S. Press the CAP button to align the texture with the rest of the wall. You might have to press the CAP button multiple times.
Select the the brush faces on the inside of the wall and texture them with the second texture. You might have to rotate the texture into the right direction by pressing shift+pgup or shift+pgdn.
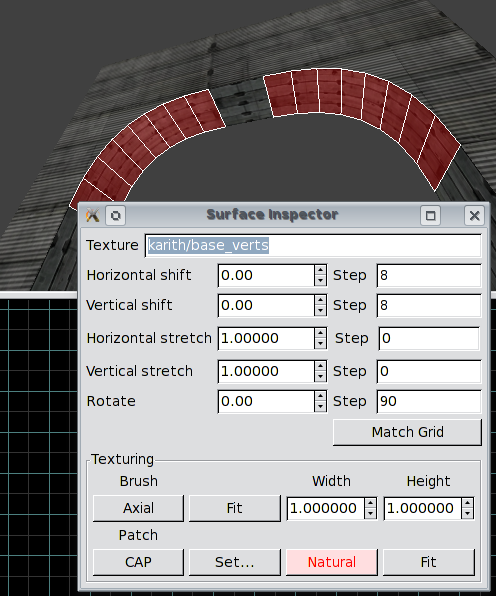
Select the patch meshes on the inside of the arch and texture them with the second texture. Open the Surface Inspector (S) again and press the Natural button.
Ingar=KCT= <ingar@telenet.be>
Best viewed with lynx.