The base system consist of the GCC compiler,
the MinGW-w64 runtime,
and MSYS utilities.
The compiler and the runtime are provided by packages from the
MinGW-builds
project. MSYS provides a UNIX-like shell environment.
Installing the MinGW Installation Manager
We begin by installing the MinGW Installation Manager. This program will allows us
to install MinGW and MSYS packages. The MSYS packages provide the shell
and the necessary command line tools, but we will not use the Installation Manager to install
the MinGW compiler suite.
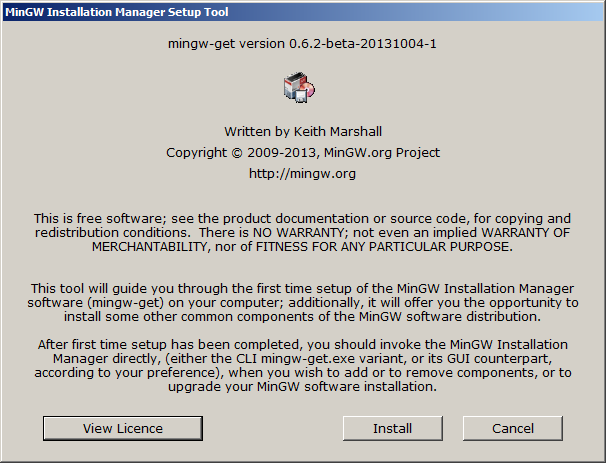
Download the MingGW Installation Manager setup:
Run the installer as Administrator. Click the Install button to accept the license and continue.
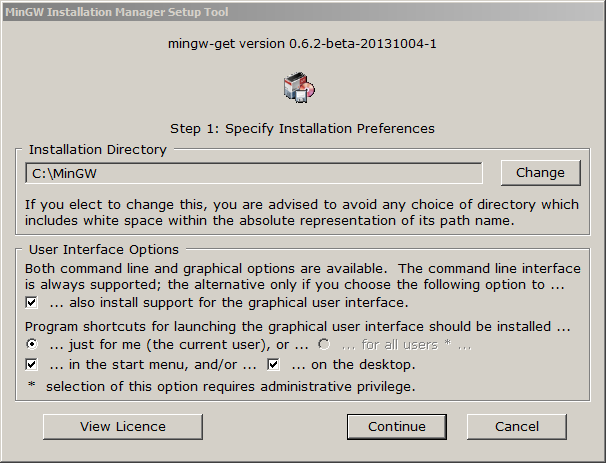
Specify the installation directory, the default C:\MinGW is usually approriate.
If you use a custom installation directory, make sure the path does NOT contain any spaces.
Review the other options and click the Continue button to begin the installation.
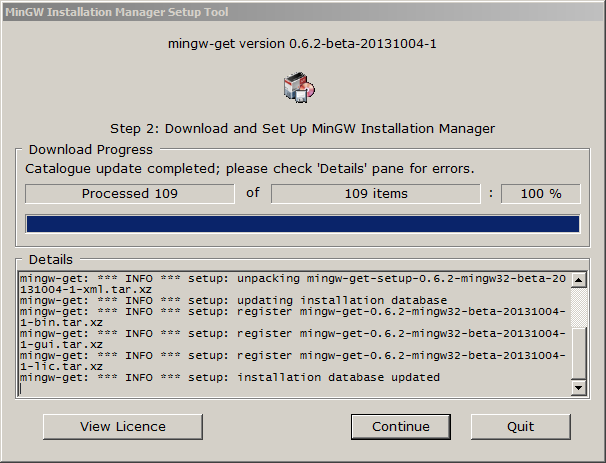
Wait until the installation has finished and click the Continue button.
Installing MSYS packages
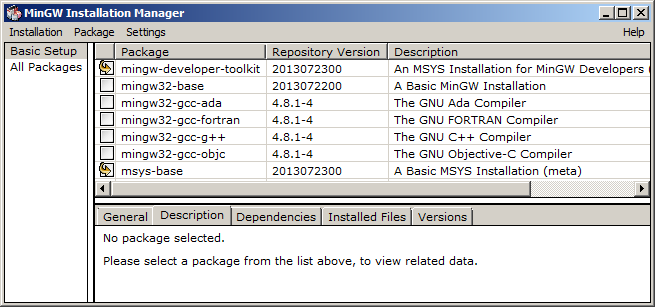
We use the MinGW Installation Manager to install the MSYS packages.
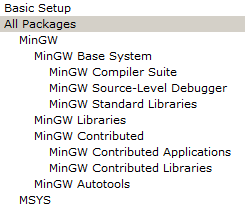
Select Basic Setup on the left side of the screen. Mark the following packages to install:
- mingw-developer-toolkit
- msys-base
Make sure no other packages are marked: later on, we will install the compiler and runtime libraries
from the mingw-w64 project instead of the default mingw32 one. The mingw-w64 compiler, despite its name,
can be used to build both 32-bit and 64-bit binaries.
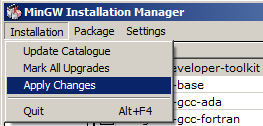
Open the Installation menu and click Apply Changes.
Click the Apply button.
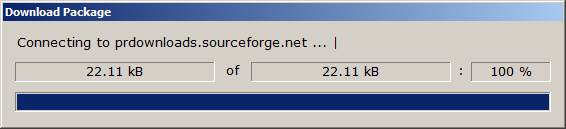
Patiently wait for the installation to complete.
Click the Close button upon completion.
Install a number of additional packages, select All Packages on the left of the screen
and mark the following packages for installation:
- msys-rxvt
- msys-unzip
- msys-wget
- msys-zip
Each package appeares multiple times. Select the one from the
bin class.
Install the packages with the same procedure:
open the Installation menu and click Apply Changes,
click the Apply button, press the Close button upon completion.
Creating a desktop shortcut
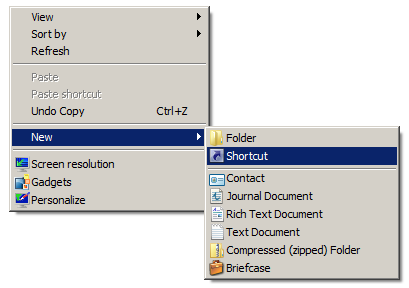
Next, we create a new shortcut to launch the MSYS shell. Click on the desktop with the right
mouse button, select New -> Shortcut.
Set the location to C:\MinGW\msys\1.0\msys.bat, and call it MSYS Shell.
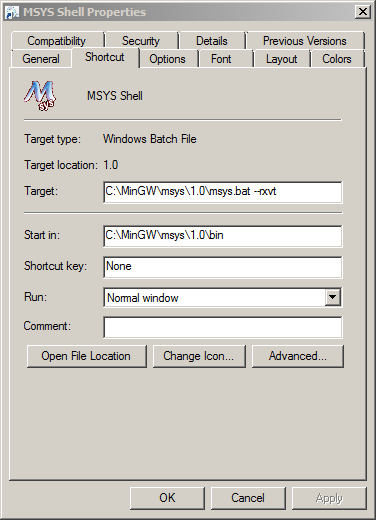
Right-click on the new shortcut and open its properties. Edit it so it looks like this:
- Target: C:\MinGW\msys\1.0\msys.bat --rxvt
- Start in: C:\MinGW\msys\1.0\bin
Press the
OK button.

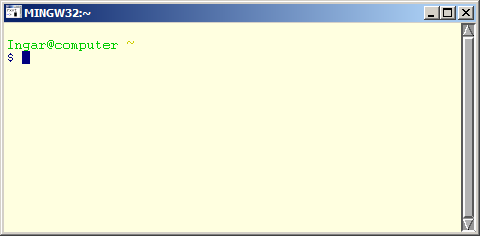
Launch the MSYS Shell by double-clicking the shortcut.
You can paste clipboard text to the RXVT terminal with the shift+insert key combination,
hence can copy the commands from this guide and paste them into the terminal window. If you use
the mouse to select text in the RXVT window, it will be automatically copied to the clipboard as well.
For configuration notes on rxvt, see http://www.mingw.org/wiki/configure_rxvt
Installing MinGW-w64
MinGW is a port of the GCC compiler to the win32 platform. MinGW-W64 adds 64-bit support and
an improved windows runtime. All related files can be found on the Sourceforge download page.
Before installing the compiler, a little bit of cleanup has to be done: the MinGW Installation Manager has put a number of packages into
C:\MinGW\mingw32, rename it to C:\MinGW\mingw32.dist.
mv /c/MinGW/mingw32 /c/MinGW/mingw32.dist
Download the i686 package:
If you want to build 64-bit applications, you'll also need the x86_64 package:
Unzip the compiler packages into the C:\MinGW directory,
you can use the 7-zip utility, or any archiver that understands the 7z format.
You should end up with two new subdirectories: C:\MinGW\mingw32 and C:\MinGW\mingw64.
These packages support the win32 threading model and do not support C11 threading.
Building GTK fails using the POSIX threading packages.
References:
Post-installation configuration
MSYS emulates a UNIX file system hierarchy.
By default, the MSYS directory C:\MinGW\msys\1.0
will be mounted as root directory / and as /usr.
Traditional windows drives like D: and E:
can be accessed as /d or /e.
Use the mount command to get an overview:
$ mount
C:\Users\Ingar\AppData\Local\Temp on /tmp type user (binmode,noumount)
C:\MinGW\msys\1.0 on /usr type user (binmode,noumount)
C:\MinGW\msys\1.0 on / type user (binmode,noumount)
c: on /c type user (binmode,noumount)
d: on /d type user (binmode,noumount)
We will add a number of extra directories to be mounted whenever a new shell is started:
/opt, where we will install a few extra packages,
/sources, where downloads will be saved,
/build32 where we will download the source code and compile packages,
and /local32, where we will install our own compiled packages.
These directories can be anywhere, but to keep the setup simple and consistent
we will create C:\MinGW\opt, C:\MinGW\build32 and C:\MinGW\local32
and mount them as /opt, /build32 and /local32.
Additionally, we create a 64-bit variant for each of the 32-bit directories. Note that the /sources
directory is the same for both environments, this prevents having to download source packages twice.
Create the necessary directories:
mkdir /c/mingw/{opt,build32,local32,build64,local64,sources}
Mount the installation directory of the custom compiler package in a convenient location:
mount 'C:\MinGW\mingw32\' /mingw32
mount 'C:\MinGW\mingw64\' /mingw64
Mount the other directories:
umount /mingw
mount 'C:\MinGW' /mingw
mount 'C:\MinGW\opt\' /opt
mount 'C:\MinGW\local32\' /local32
mount 'C:\MinGW\build32\' /build32
mount 'C:\MinGW\local64\' /local64
mount 'C:\MinGW\build64\' /build64
mount 'C:\MinGW\sources\' /sources
Create necessary subdirectories in /local32, /local64 and /opt:
mkdir /opt/bin /local{32,64}/{bin,etc,include,lib,share}
mkdir /local{32,64}/lib/pkgconfig
Create /local32/etc/profile.local:
cat > /local32/etc/profile.local << "EOF"
#
# /local32/etc/profile.local
#

alias dir='ls -la --color=auto'
alias ls='ls --color=auto'

PKG_CONFIG_PATH="/local32/lib/pkgconfig"
CPPFLAGS="-I/local32/include"
CFLAGS="-I/local32/include -mms-bitfields -mthreads"
CXXFLAGS="-I/local32/include -mms-bitfields -mthreads"
LDFLAGS="-L/local32/lib -mthreads"
export PKG_CONFIG_PATH CPPFLAGS CFLAGS CXXFLAGS LDFLAGS

PATH=".:/local32/bin:/mingw32/bin:/mingw/bin:/bin:/opt/bin"
PS1='\[\033[32m\]\u@\h \[\033[33m\w\033[0m\]$ '
export PATH PS1

# directory where sources will be downloaded
LOCALSOURCEDIR=/sources
# package build directory
LOCALBUILDDIR=/build32
# package installation prefix
LOCALDESTDIR=/local32
export LOCALBUILDDIR LOCALDESTDIR

EOF
Create /local64/etc/profile.local:
cat > /local64/etc/profile.local << "EOF"
#
# /local64/etc/profile.local
#

alias dir='ls -la --color=auto'
alias ls='ls --color=auto'

PKG_CONFIG_PATH="/local64/lib/pkgconfig"
CPPFLAGS="-I/local64/include"
CFLAGS="-I/local64/include -mms-bitfields -mthreads"
CXXFLAGS="-I/local64/include -mms-bitfields -mthreads"
LDFLAGS="-L/local64/lib"
export PKG_CONFIG_PATH CPPFLAGS CFLAGS CXXFLAGS LDFLAGS

PATH=".:/local64/bin:/mingw64/bin:/mingw/bin:/bin:/opt/bin"
PS1='\[\033[31m\]\u@\h \[\033[33m\w\033[0m\]$ '
export PATH PS1

# directory where sources will be downloaded
LOCALSOURCEDIR=/sources
# package build directory
LOCALBUILDDIR=/build64
# package installation prefix
LOCALDESTDIR=/local64
export LOCALBUILDDIR LOCALDESTDIR

EOF
Make sure it is executed on login:
cat >> /etc/profile << "EOF"
if [ -f /local32/etc/profile.local ]; then
        source /local32/etc/profile.local
fi

EOF
Apply the new settings:
source /local32/etc/profile.local
Note that the default environment is 32-bit. You can switch to the 64-bit environment with the following command:
source /local64/etc/profile.local
Configuring vim
(Skip this section if you don't want to use the VIM editor)
Create a configuration file for VIM:
cat > ~/.vimrc << "EOF"
" Configuration file for VIM
set nocompatible
set bs=2                " allow backspacing over everything in insert mode
set ai                  " set autoindenting on
" set backup            " keep a backup file
set nobackup            " do not keep a backup file
set history=1024	    " keep 1024 lines of command line history
set ruler               " show the cursor position all the time
set tabstop=8           " tab at 8 characters
set shiftwidth=8        " 8 characters indentation
set nowrap              " do not wrap long lines
set visualbell          " no bell
set background=light    " msys rxvt has a light background
"set background=dark    " mingw shell uses a black background
syntax on               " syntax highlighting on
EOF
Set vim as default editor in the local environment:
cat >> /local32/etc/profile.local << "EOF"
EDITOR=vim
export EDITOR
EOF

cat >> /local64/etc/profile.local << "EOF"
EDITOR=vim
export EDITOR
EOF
Installing additional packages in /opt
A number of additional programs are required to build the local packages.
We install them in /opt to keep the files installed there from interfering
with the packages we are going to build ourselves. This way, the compiler will never link
with libraries installed in /opt/lib and prevent other accidental mix ups.
You do not need to install both the 32-bit and 64-bit version of these programs.
Use the 64-bit versions if you're running 64-bit Windows.
7zip
Make sure 7zip is installed and verify where the installation is located.
Copy 7z.exe to /opt/bin.
cp /c/Program\ Files/7-Zip/7z.exe /opt/bin
Installing git
Git is a free and open source distributed version control system designed to handle everything
from small to very large projects with speed and efficiency.
Download Git for Windows portable, and copy the content of the mingw32 (for the 32-bit version) or the mingw64 (for the 64-bit version)
to /opt/git.
To install the 32-bit version:
cd "${LOCALSOURCEDIR}" && \
wget -c --no-check-certificate -O PortableGit-2.13.0-32-bit.7z.exe \
https://github.com/git-for-windows/git/releases/download/v2.13.0.windows.1/PortableGit-2.13.0-32-bit.7z.exe && \
cd "${LOCALBUILDDIR}" && \
mkdir "git-2.13.0-x86" && \
cd "git-2.13.0-x86" && \
7z x "${LOCALSOURCEDIR}/PortableGit-2.13.0-32-bit.7z.exe" && \
cp -va mingw32 /opt/git
To install the 64-bit version:
cd "${LOCALSOURCEDIR}" && \
wget -c --no-check-certificate -O PortableGit-2.13.0-64-bit.7z.exe \
https://github.com/git-for-windows/git/releases/download/v2.13.0.windows.1/PortableGit-2.13.0-64-bit.7z.exe && \
cd "${LOCALBUILDDIR}" && \
mkdir "git-2.13.0-x64" && \
cd "git-2.13.0-x64" && \
7z x "${LOCALSOURCEDIR}/PortableGit-2.13.0-64-bit.7z.exe" && \
cp -va mingw64 /opt/git
Add the git bin/ directory to PATH of the local environment:
cat >> /local32/etc/profile.local << "EOF"

PATH="$PATH:/opt/git/bin"
export PATH
EOF

cat >> /local64/etc/profile.local << "EOF"

PATH="$PATH:/opt/git/bin"
export PATH
EOF
Installing Subversion
Subversion is an open source version control system.
Download and install the win32 subversion client using the following commands:
cd ${LOCALSOURCEDIR} && \
wget -c --no-check-certificate "http://downloads.sourceforge.net/project/win32svn/1.8.17/apache22/svn-win32-1.8.17.zip" && \
cd ${LOCALBUILDDIR} && \
unzip ${LOCALSOURCEDIR}/svn-win32-1.8.17.zip && \
cp -va svn-win32-1.8.17 /opt/svn
Add the subversion bin/ directory to PATH of the local environment:
cat >> /local32/etc/profile.local << "EOF"

PATH="$PATH:/opt/svn/bin"
export PATH
EOF

cat >> /local64/etc/profile.local << "EOF"

PATH="$PATH:/opt/svn/bin"
export PATH
EOF
Installing cmake
CMake is an open-source, cross-platform family of tools designed to build, test and package software.
CMake is used to control the software compilation process using simple platform
and compiler independent configuration files, and generate native makefiles and workspaces
that can be used in the compiler environment of your choice.
To install the 32-bit version:
cd ${LOCALSOURCEDIR} && \
wget -c --no-check-certificate "https://cmake.org/files/v3.8/cmake-3.8.1-win32-x86.zip" && \
cd ${LOCALBUILDDIR} && \
unzip ${LOCALSOURCEDIR}/cmake-3.8.1-win32-x86.zip && \
cp -va cmake-3.8.1-win32-x86 /opt/cmake
To install the 64-bit version:
cd ${LOCALSOURCEDIR} && \
wget -c --no-check-certificate "https://cmake.org/files/v3.8/cmake-3.8.1-win64-x64.zip" && \
cd ${LOCALBUILDDIR} && \
unzip ${LOCALSOURCEDIR}/cmake-3.8.1-win64-x64.zip && \
cp -va cmake-3.8.1-win64-x64 /opt/cmake
Add the cmake bin/ directory to PATH of the local environment:
cat >> /local32/etc/profile.local << "EOF"

PATH="$PATH:/opt/cmake/bin"
export PATH
EOF

cat >> /local64/etc/profile.local << "EOF"

PATH="$PATH:/opt/cmake/bin"
export PATH
EOF
Installing Python 3
Python is a programming language that lets you work more quickly and integrate your systems more effectively.
Install Python 3 using the following procedure:
- Download the installer (32-bit or 64-bit) and run it.
- Choose Customize installation and change the
installation path to C:\MinGW\opt\python3
Add the python3/ directory to PATH of the local environment:
cat >> /local32/etc/profile.local << "EOF"

PATH="$PATH:/opt/python3"
export PATH
EOF

cat >> /local64/etc/profile.local << "EOF"

PATH="$PATH:/opt/python3"
export PATH
EOF
Building packages
The following sections of this guide describe how to build various local packages.
If you do not want to build them yourself, you can download my build:
- 32-bit local packages, without Gtk+.
- msys-2017-05-29-local32-base.7z
- 64-bit local packages, without Gtk+.
- msys-2017-05-29-local64-base.7z
- 32-bit local packages, including Gtk+.
- msys-2017-07-30-local32-gtk.7z
- 64-bit local packages, including Gtk+.
- msys-2017-07-30-local64-gtk.7z
These packages should be extracted into the main installation directory C:\MinGW,
you should end up with C:\MinGW\mingw32 and/or C:\MinGW\mingw64.
Remember you can always switch between environments by reading the apporiate profile:
To switch to the 32-bit build environment:
source /local32/etc/profile.local
To switch to the 64-bit build environment:
source /local64/etc/profile.local